
Silicone doll photography is not determined by the model alone. Facial structure, body proportions, surface finish, lens choice, camera height, lighting, posing and background scale all affect how realistic the final image appears. A model that looks convincing in person can still photograph poorly if a wide lens distorts the face, hard light creates distracting reflections, or the pose lacks support.
This guide explains how to choose, prepare and display a realistic silicone doll for portraits, full-body images and collector presentation. It also covers practical details that product photos may not show clearly, including weight, room planning, clothing fit and long-term display safety.
Silicone Doll Photography: Quick Planning Checklist
Before comparing models or planning a shoot, define the result you want. A close portrait, a full-body composition and a permanent room display require different decisions. Use this checklist before buying or setting up:
- Decide whether the main use is portrait photography, full-body photography, display or a combination.
- Confirm the doll’s height, shoulder width, seated height, foot size and total weight.
- Check the available skeleton, joint movement and supported posing options.
- Plan how the doll will be moved, positioned and supported without forcing the joints.
- Measure the shooting space, furniture and background before choosing a body size.
- Choose a lighting setup that controls reflections and keeps the silicone away from excessive heat.
- Verify which clothing, wig, accessories and display items are actually included.
- Prepare a cleaning and storage routine for after the shoot.
Choose the Model for the Intended Shot
Start with the type of image you plan to create. For close portraits, pay particular attention to the face shape, eye alignment, expression, hairline and transitions around the mouth and neck. For full-body images, proportion, posture and the relationship between the head, shoulders, torso and legs become more important.
Surface finish also matters. A very glossy finish may produce strong highlights under direct light, while a more controlled finish can be easier to photograph with a simple setup. Do not judge realism from one heavily edited product image. Compare several angles, close-ups and full-body views, and ask whether promotional images show the same configuration being sold.
The Silicone Realism collection is the relevant place to compare models designed around visual detail. For a closer explanation of why body balance affects the final result, read the guide to realistic doll proportions.
Size, Weight and Room Planning
A model should fit the composition as well as the room. Taller models can create a strong full-body presence, but they require more background height, greater camera distance and more room for repositioning. A smaller-frame model may be easier to move and photograph in a limited space, although exact weight still depends on construction and options.
Review the published measurements rather than relying only on labels such as petite, life-size or compact. The realistic doll size guide explains which dimensions affect handling and visual scale. If movement is a concern, compare the listed specifications with the practical advice in how heavy silicone dolls are. The small-frame silicone collection can also help narrow the options for tighter rooms.
Measure doorways, stairs, storage areas and the planned display position. Any chair, stand or shelf used for presentation should have a suitable size and load rating. Leave a clear path for handling so the doll does not need to be carried around lighting stands, cables or fragile props.
Skeleton, Posing and Hidden Support
Natural-looking posing comes from balance, small joint adjustments and reliable support. Confirm which joints are articulated and whether standing is supported for the specific model. Never assume that a pose shown in a promotional photo can be held safely without a stand, chair or off-camera support.
Begin with a simple seated or supported pose. Adjust the torso, shoulders, elbows, wrists and head gradually, and stop if a joint resists. For a standing composition, follow the manufacturer’s instructions and use approved support. Avoid forcing the knees, ankles or toes into a position simply to match a reference image.

Support should be stable but visually unobtrusive. Furniture, cushions and carefully positioned props can provide support within the scene, while a stand may be hidden by framing or removed during normal image editing. Stability comes first: never trade safe support for a cleaner composition.
Lens Choice and Camera Position
Camera distance and focal length influence perceived proportion. A wide lens used very close to the subject can exaggerate whichever feature is nearest the camera, making the face, hands or feet appear out of balance. Moving the camera farther away and using a normal or short-telephoto focal length often produces a more natural portrait perspective.
There is no single best lens for every room or composition. Start with the focal lengths available to you, keep enough distance to avoid obvious distortion and compare test frames before building the complete set. For portraits, place the camera near face height unless a deliberate high or low angle serves the composition. For full-body images, check both vertical and horizontal framing and watch the edges of the frame for stretched limbs.
Nikon’s official portrait photography tips provide a useful general reference for focal length, eye focus, white balance and harsh-shadow control. Apply the same principles to a doll while adjusting the setup for its surface and fixed expression.
Lighting and Surface Reflection
Soft, diffused light is usually easier to control than a small direct light source. A large window with indirect light, a softbox or a light bounced from a neutral surface can reduce hard reflections and reveal form without making every surface highlight dominant. Keep hot lights and direct sunlight away from the silicone, and follow the manufacturer’s temperature and care guidance.
Set white balance for the actual light source so skin tones do not shift unnecessarily warm, cool or green. Then take a close test image of the forehead, cheeks, nose, shoulders and any other area facing the light. Check the histogram or highlight warning if your camera provides one; bright reflections can lose detail before the rest of the image looks overexposed.
Do not apply powder, oil, makeup or a mattifying product unless it is confirmed as suitable for that exact silicone and finish. A safer first step is to change the light angle, increase the apparent size of the light source, move the camera or use a reflector to control contrast.
Styling, Clothing and Background Scale
Clothing should fit the listed measurements rather than the model’s height alone. Check the bust, waist, hips, shoulder width and foot size before ordering an outfit. Dark or strongly dyed fabrics may transfer color, especially when they remain in contact with silicone for a long period. Wash new clothing where appropriate, test uncertain material in an inconspicuous area and prefer lighter fabrics for extended wear.
Confirm whether the clothing, wig, jewelry and props shown in product photos are included. Promotional images may use styling items that are sold separately. If a specific look is essential, request an itemized confirmation before purchase.
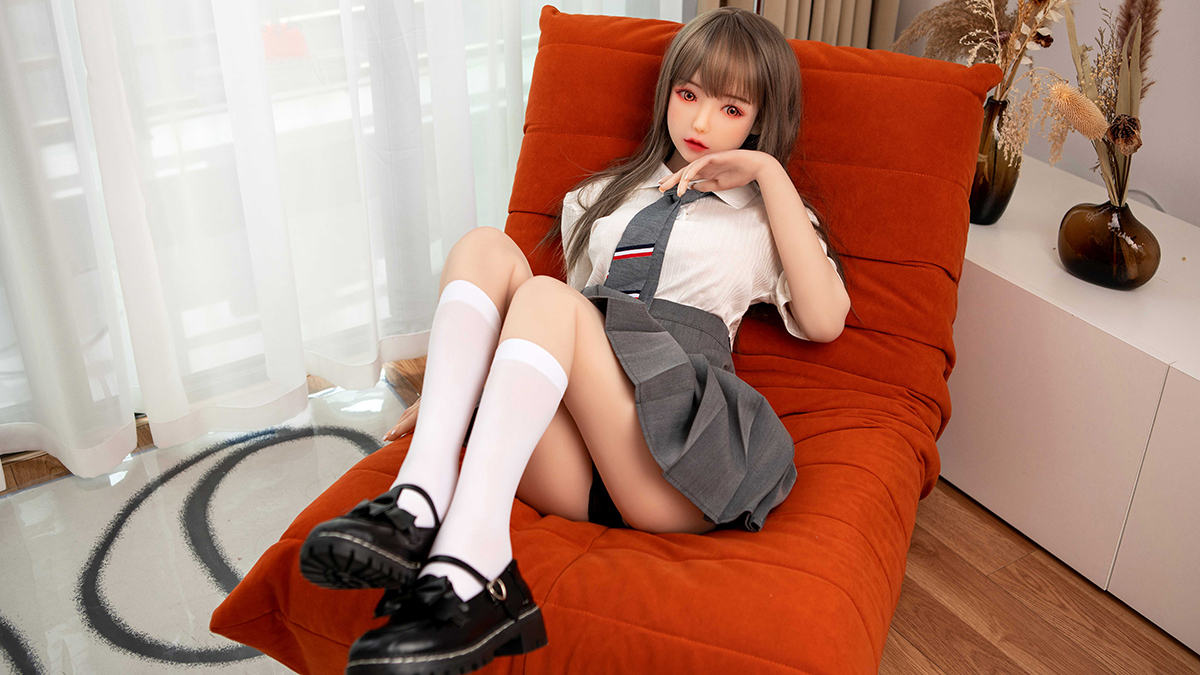
Use props that match the doll’s scale. An undersized chair or an unusually tall table can make otherwise realistic proportions look wrong. A simple background is often the best starting point because it makes unwanted reflections, support problems and scale conflicts easier to notice. Add decorative elements only after the pose and lighting work on their own.
Prepare the Doll Before a Shoot
Inspect the surface in good light before dressing or posing. Remove loose dust with an approved method, make sure cleaned areas are fully dry and check that no residue remains on the face, hands or joints. Follow the steps in how to clean silicone dolls properly instead of improvising with household chemicals.
Arrange the wig away from the face, check eye alignment and examine clothing for clips, exposed fasteners or rough edges that may mark the surface. Make small styling changes between test frames. For ongoing routines, the main sex doll care and maintenance guide covers cleaning, handling and inspection in more detail.
Long-Term Display Safety
A pose that works for a short photo session is not automatically suitable for permanent display. Avoid leaving the doll in an extreme joint position or allowing one small area to carry concentrated pressure for long periods. Use stable, appropriately rated furniture or support, and periodically inspect the contact points, clothing and pose.
Keep the display away from direct sunlight, excessive heat, sharp objects, pets and unsupervised access by children. Make sure the position cannot block a doorway or create a lifting hazard. When the model is not being displayed, follow the manufacturer’s instructions and the practical guidance on storing silicone dolls properly.
Before Buying for Photography and Display
Ask for the exact specifications of the configuration you intend to order. Confirm height, weight, material, head and body options, skeleton features, standing capability, included accessories, production images, packaging and after-sales support. If a feature is important to the project, obtain a written answer rather than relying on a similar model’s description.
Use the silicone doll buying guide to review the wider purchase process, then compare suitable options in the full silicone collection. The goal is not simply to choose the most detailed product image. It is to select a model whose measurements, construction and handling requirements fit the way you actually plan to photograph or display it.
Frequently Asked Questions
Are realistic silicone dolls suitable for photography?
Yes. Detailed facial features, stable proportions and a suitable surface finish can work well for portrait and full-body photography. The final realism still depends on lens perspective, lighting, posing, styling and the accuracy of the product configuration.
What lens is best for silicone doll photography?
No single lens is best for every setup. A normal or short-telephoto focal length used from a comfortable distance is often a practical starting point for portraits because it can reduce the exaggerated perspective caused by placing a wide lens too close. Room size and the intended framing should guide the final choice.
How can I reduce shine on a silicone surface?
Start with a larger, softer light source and adjust the angle between the light, doll and camera. Check exposure on the brightest highlights. Do not apply powder or another product unless the manufacturer confirms that it is compatible with the specific silicone and finish.
Can a silicone doll remain posed for a long-term display?
Only within the maker’s support and posing guidance. Avoid extreme joint positions and concentrated pressure, use stable furniture or approved support, and inspect the doll periodically. A short-term photographic pose may not be appropriate for continuous display.
What should I verify before buying a model for photography?
Verify the exact measurements, weight, material, skeleton options, supported poses, standing capability, surface finish and included accessories. Compare several unedited angles when possible and confirm that the specifications apply to the exact head and body combination being ordered.
Are the clothes and accessories in product photos included?
Not necessarily. Wigs, clothing, jewelry, furniture and props may be used only for presentation. Check the product description and request an itemized confirmation if any displayed accessory is important to your planned shoot.

